|
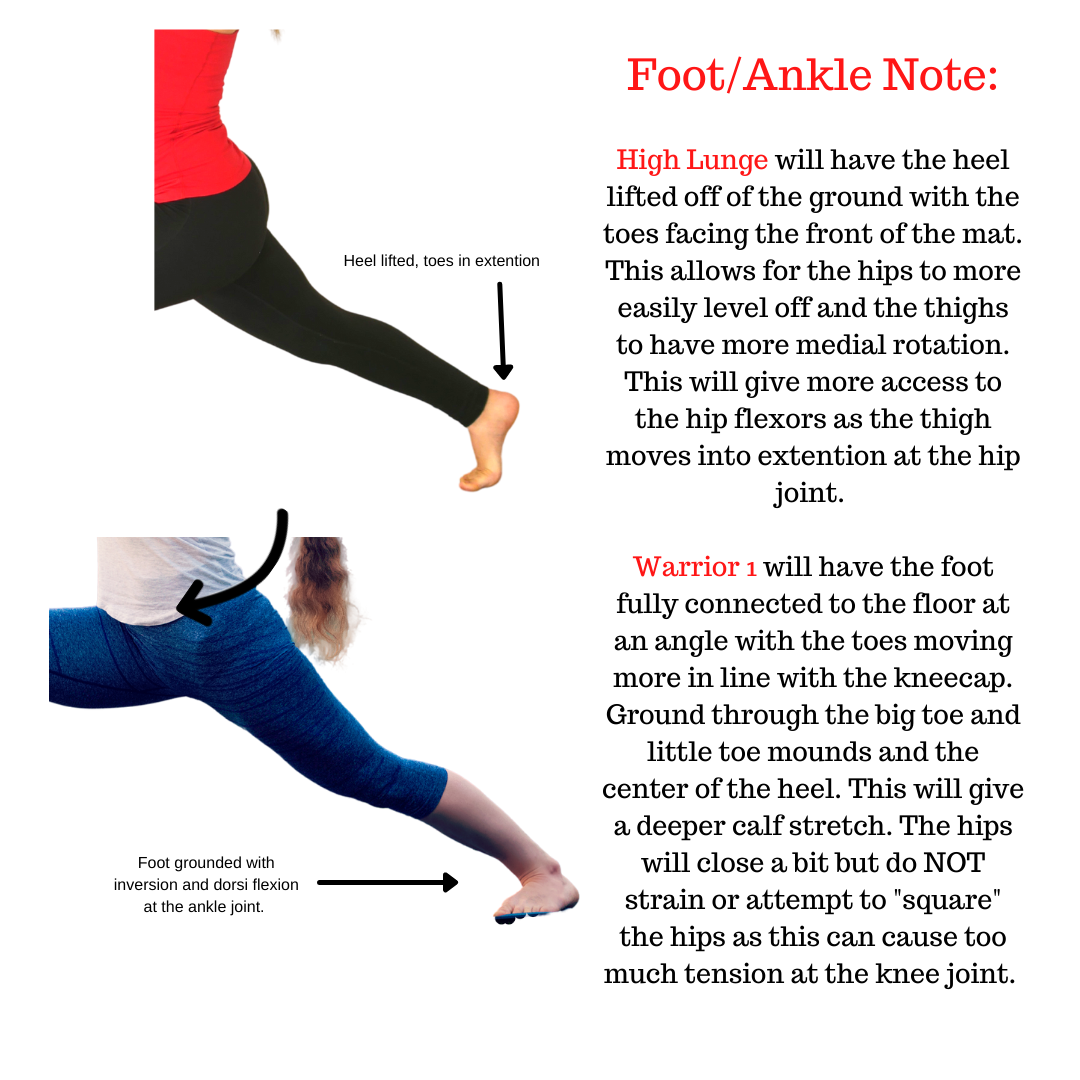
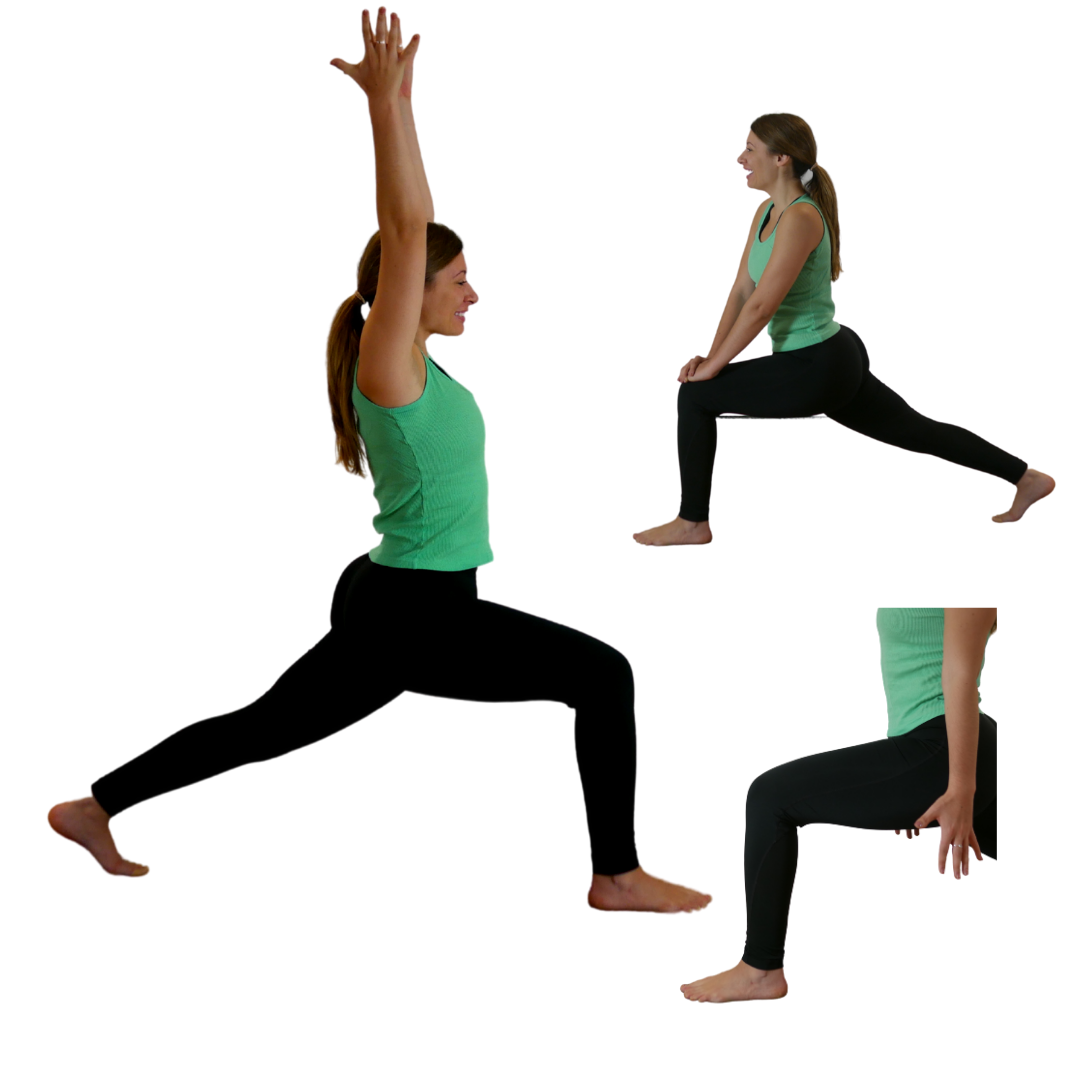
Veer-bha-drah-shah-nah A Virabhadra (वीरभद्र) = Distinguished hero, also considered to be the fierce aspect of Shiva Asana (आसन) = Pose, Posture, Seat Virabhadrasana (वीरभद्रासन) Warrior 1 is a vigorous pose that fiercely strengthens the legs, while toning the core and shoulders. There is a bit more stylistic difference in the upper body depending on which tradition or lineage one follows. I will make note of some of the differences and leave it up to yogi's choice. Some variations feature a more upright spine and others a deeper back bend. I would say what you choose would depend on what you want to get out of the posture. For the monthly challenge above. Just Plain Yoga educator Amanda Lease is demonstrating a variation with a shorter stance and elongated spine. This variation will be accessible to most and offers the most support for balance and stability. What might be most notable about the pose warrior one is that it faces straight forward with an open hearted expression. This embodies strength within vulnerability. As we settle our feet deeply onto the earth we also reach joyfully towards the heavens above and as we breathe we allow our bodies to be suspended in the balance between. Some traditions teach warrior one with the back heel off of the ground. Most lineages will opt for the foot slightly turned out with the heel grounded. The majority will call the heel lifted version High Lunge and the heel down version Warrior One. We will continue with that majority rule nomenclature. Cautions: With all exercise make sure you have communicated with your doctor to see if it is right for you. If you have uncontrolled high blood pressure, do not raise your arms overhead. instead practice the pose with your hands on your hips. How to do Warrior One Pose:
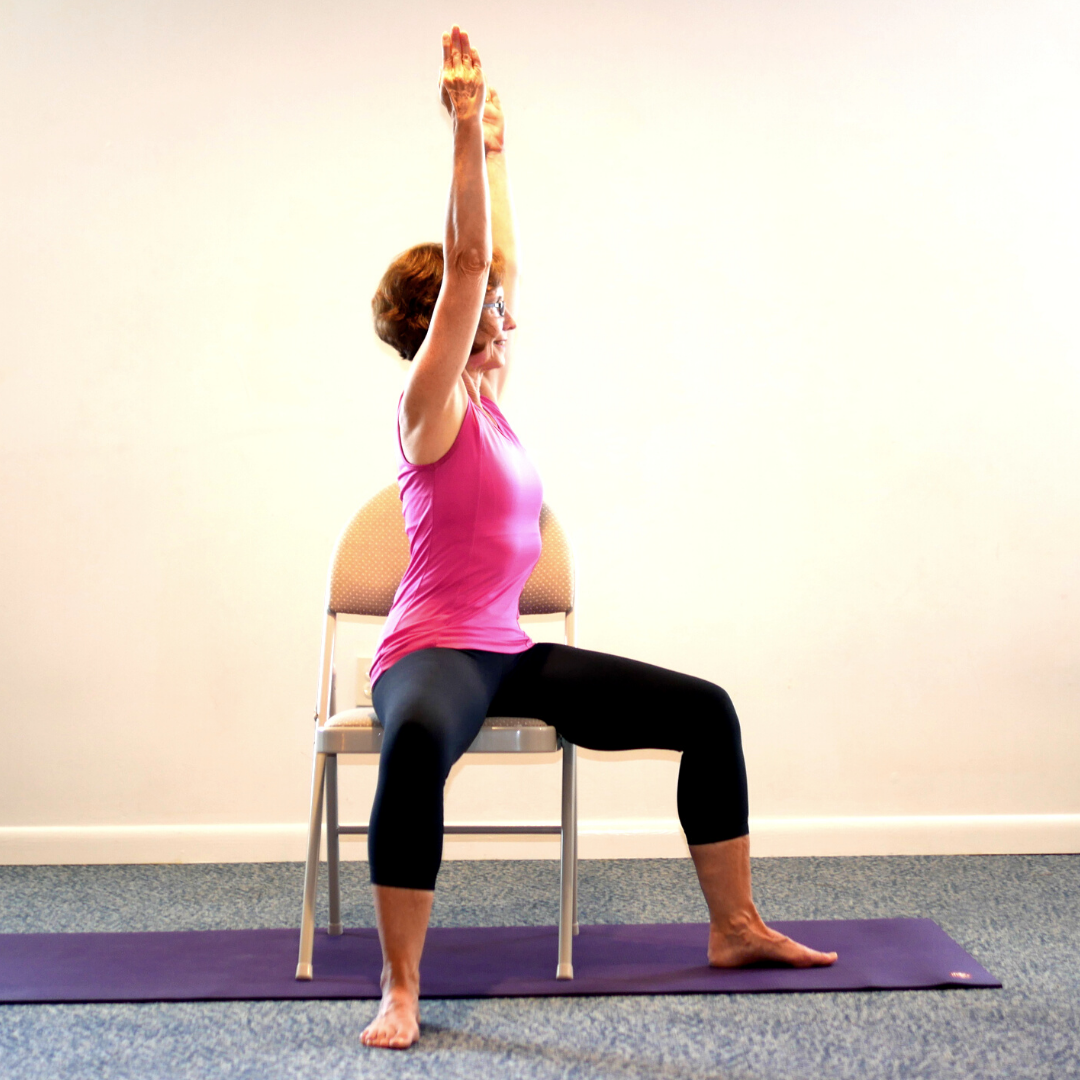
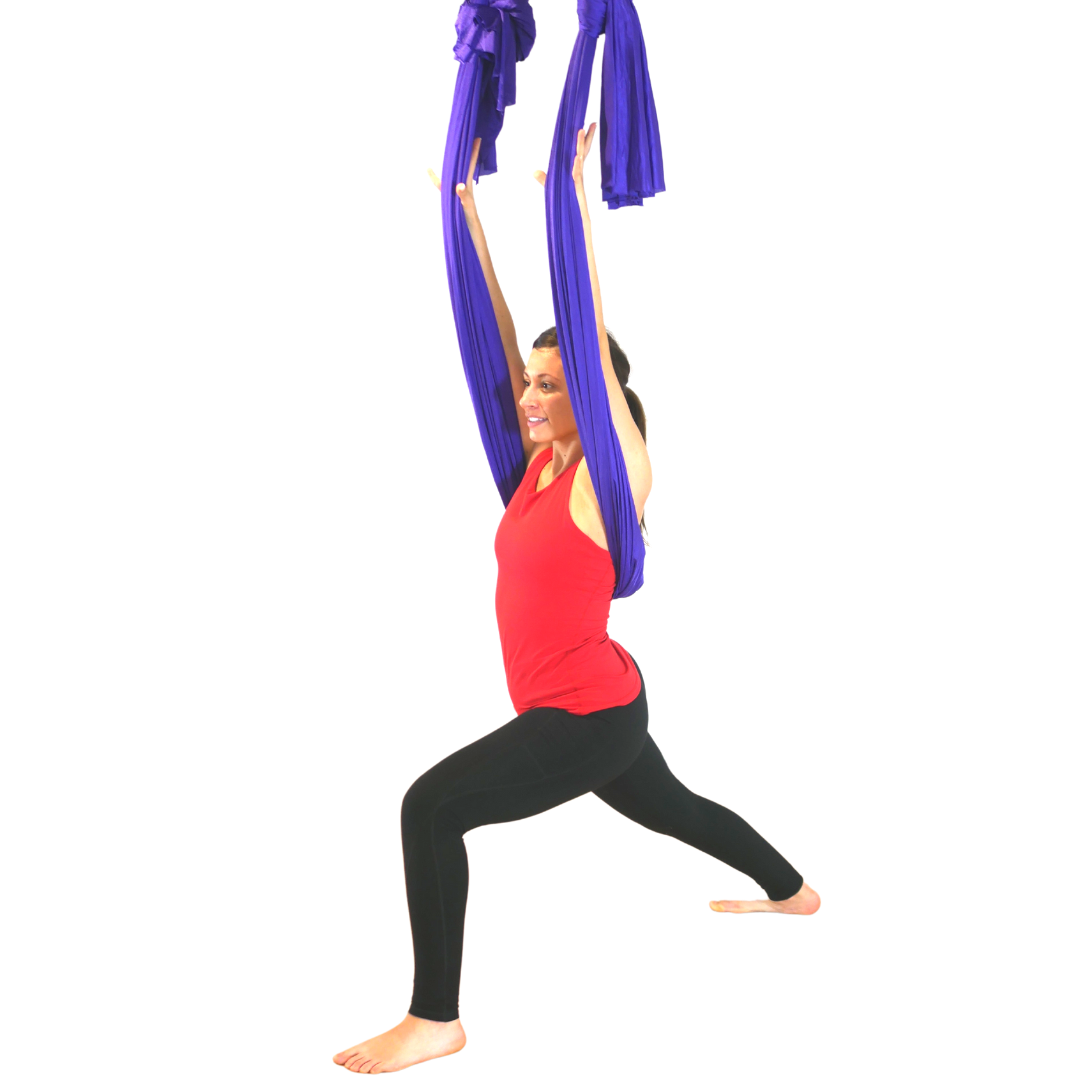
The greatest challenge in Warrior 1 is to get the angel of the foot comfortable and grounded while turning the hips towards the front. When I teach embodied anatomy courses I always take a poll to see what poses students love, what poses they find most frustration and why. Unanimously Warrior 1 always comes to the top three of the most hated yoga poses. Before you run away from the rest of this blog and challenge let me explain why students have felt that way and why with a little bit of adjustment warrior 1 can become a more loved expression. Most of what students hate comes from cues that do not serve the form or the individual bodies practicing. That's right I am about to blow up some outdated old school cues that simply do not align with the anatomy of the body and need to be pulled out of the yoga verbiage. Things you might here a yoga teacher say that you should absolutely ignore: STOP THE MADDNESS! Cue #1: Align the back heel with the front heel. - This cue only works if you have an extremely narrow pelvic girdle! Instead of trying to have the feet on one line like a tight rope move the feet wider apart (hips distance from side to side). This will give you better balance and make space in the pelvis for you to adjust the thigh bones which will alleviate a good deal of tension in trying to shine the hip points closer to the front of the mat. Please not that the original cue was from men to other men in the practice and that a man's pelvis is taller and significantly more narrow than a woman's pelvis. Students with a shorter broader pelvis (mostly women) can feel hip strain and forcing a narrow stance can lead to longer term chronic hip pain. So take up more space and fell free to move around your mat. Cue#2: Ground though the outer edge of the back foot- Please stop doing this immediately! Instead ground evenly through the center of your heel, big toe mound and little toe mound (on both feet). This will keep the feet even and the arches engaged. The reason we do NOT want to emphasize the outer edge is that can cause a force into supination of the foot putting too much strain on the outside edge of the ankle (lateral side) this tension runs up the outer edge of the leg and can add stress to the outer knee. Additionally, when we press on the outer edge (which you promise me you will not do anymore...) it pulls the thigh into lateral rotation which pulls the hip slightly open and that is exactly the opposite way your are aiming to place the hips so, you guessed it, that puts the hips and ankles at odds with one another and the knee takes all of the torque and strain in the battle between the ankle and knee. This is due to the screw home mechanism of the knee and, of course, the screw home mechanism of the knee is another blog for another day, so for now just lightly ground the whole foot and stop stressing the outer edge. Cue #3: Square your hips to the front of the room- Oh, my... where do I begin. OK this is ok and easy if the stride from front to back is relatively short and there is very little extension of the back thigh, or if you are in the high lunge variation where the back heel is off of the ground. Once you start to open up the pose and move the back foot further behind you that will pull the femur bone (thigh bone) further into extension and pull the pelvis along with it (increasing the forward/ anterior tilt of the pelvis). When we turn the back foot down to the angle it also pulls the pelvis slightly to the side (the longer the stride the bigger the pull). At a certain point it is anatomically near impossible to shine both hip points to the front of the mat while the foot and thigh are in that position. Instead more the hips forward (closing the hips, ipsilateral rotation/ adduction) to the best of your ability and enjoy the stretch. It should feel steady and opening, it should NOT be painful or exceedingly uncomfortable. Cue #4: When the arms reach up pull your shoulders in and down your back- Oh I apologize for swearing ahead of time, but for @#&^ sake tell the teacher to go take an anatomy class! I'll do my best to break this down in an easy fashion but warn you that the scapula humeral rhythm of the shoulder is also another blog in the making. The short form is that the shoulder blade, clavicle and arm bone are all connected and move together in actions that are coupled together so that the arm will stay lined up with the socket of the shoulder blade. When we lift an arm over head (flexion of the arm at the shoulder joint)the shoulder blade should be allowed to go with its natural movement which includes upward rotation, protraction and elevation. This mean that as we reach the arms up the shoulder blades will separate a bit and lift. This is normal! When a teacher says to pull your shoulders down away from your ears and onto your back they are trying to place the shoulder blades in the exact opposite of what is necessary to fully reach the arms overhead. At best it would be difficult to raise the arms and straiten the elbows, at worst with repetitive motion this can contribute to an impingement syndrome in the shoulders. So reach those arms high and let your shoulders rise. Give them freedom to move and this will increase the strength in the top of the shoulder while increasing the mobility in your LATS. You and your shoulders will be happier. When we have taken the time to evaluate what we need to create a balance of effort and ease in this pose we can then truly appreciate the power in the subtle actions of this incredible posture. Some easy and challenging possibilities below: Give yourself permission to start small and build strength and range over time. Please send me your posture questions and requests, I do love a good geek out.
About Chris Loebsack
0 Comments
Leave a Reply. |
Boundless Yoga Staff & StudentsWe are continuously interested on how our reactions and responses to our personal journeys, albeit travel, adventure, new job, etc. mirror and reflect our social, emotional and spiritual ups and downs. We try every day to apply what we learn about ourselves on the yoga mat to our personal lives. Thank you for tuning in as we share some of those aspects with you. Archives
December 2022
Categories
All
|
- HOME
-
- Monthly Challenge
- Book Club Discussion
- 7/11-8/1 (Thurs) Meditation & Mindful Movement Series
- 7/17 Beach Day Yoga Road Trip: Ocean Groove NJ
- 8/3- 8/28 (Tues): Roll & Release Series
- Sept/Oct: Inversion Immersion
- Sept-Dec: Personal Development Course
- 9/15 Moon Planning Workshop
- Bhakti Flow and Kirtan w/ Ian Froman
- Schedule
-
- 200 Hour Teacher Training
- 300 Hour Teacher Training
- Arm Balance Academy - CE Program
- Inversion Immersion Training Program
- Personal Development- Continuing Studies
- Thai Yoga Training
- The Boundless Breath ~ Pranayama Training Weekend
- The Koshas Demystified - Yoga Philosophy Course
- Rollit & Release it: Yoga and Fascia Continued Studies
- Yin Yoga Basics Course
- Yin Yoga Advanced Course
- Aerial Yoga Teacher Training
- Professional Development Continuing Studies Module
- Boundless Vinyasa Sequencing- Unlock the Power of Combination and Flow
- Aerial Yoga Yin-Restorative Training
- Graduate Directory
- Yoga Online Anytime
- Contact Us
- Blog: Insights from our Staff and Students
- Community Resources
- Studio Rental
- Media and News
- Yoga Podcast: Chats from the Mat w/ Brian M. Davis
Get more updates and fun yoga information on our Facebook page!


 RSS Feed